There isn’t just one way to turn on your keyboard lights. It can vary wildly among laptop and peripheral manufacturers and even among different laptop lines from the same brand.
To bring a bit of clarity to the situation, we’ve gathered together seven possible ways to turn your keyboard backlighting on or off. Read on to find the best method for your laptop or desktop keyboard.
Image used with permission by copyright holder
Press the dedicated button for keyboard backlighting
Some keyboards, like the Logitech G Pro desktop keyboard, will actually have a dedicated button that you can press to toggle the keyboard light on or off. In the case of the Logitech G Pro, you’ll want to look for a button stamped with a sun icon with rays in the upper-right corner of the keyboard.

Bill Roberson/Digital Trends
Press the Increase Brightness button
If you have a MacBook, certain models allow you to turn on the backlighting by pressing the Increase brightness key, which looks like half of the sun with three rays. Press it until you get the desired level of keyboard light brightness. To turn it off, press the Decrease brightness key, which looks like a half-circle outlined in dots (instead of the rays) until the light turns off.
Using the Increase/decrease brightness buttons should work for certain models of Macs that run macOS Sonoma, Ventura, High Sierra, Mojave, Catalina, Big Sur, or Monterey.
Bill Robertson/Digital Trends
Press the assigned Function key
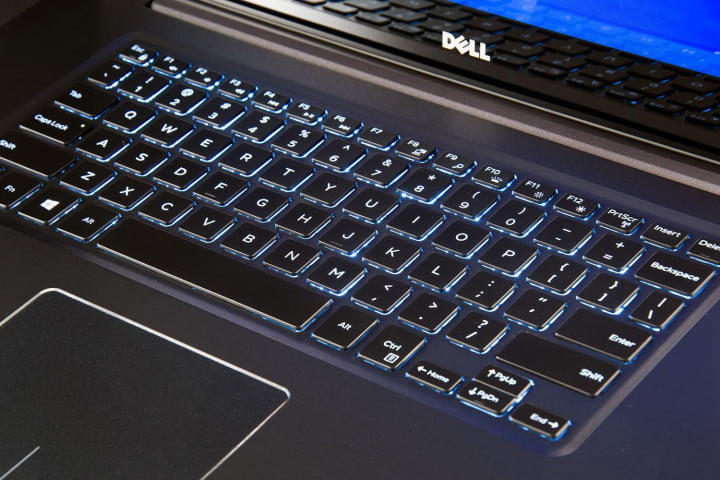
For many Windows laptops, you might need to press a Function key (F1 to F12) to turn on your keyboard’s backlighting. If this is the case, which Function key it is will likely depend on the brand and model of your laptop.
For example, Dell notebook PCs have at least three possible key options: F6, F10, or the right-arrow key. In some cases, F5 is also possible. From these options, you should be able to tell which one controls the backlighting by seeing which one has the Illumination icon (which looks like a half-sun with rays) stamped on it. If you don’t see this icon at all, your Dell PC doesn’t have keyboard backlighting. But if you do see the icon, press the Function key that has it. (You may need to press it in conjunction with the Fn key.) Pressing that key combination – Fn + the function key – should allow you to cycle through various brightness level options for your Dell PC’s keyboard, so keep pressing it until you reach your desired brightness level or until you turn it off.
HP notebook computers work similarly to
The main thing, though, is that if you don’t know the keyboard shortcut or Function key assigned to your keyboard’s backlighting feature, you should look it up in your PC’s manufacturer’s support site or manual to find out.

Chesnot/Getty Images
Use the Touch Bar
Certain MacBook models may have you adjust your keyboard lighting via the Touch Bar instead. To do so, tap the Arrow icon on the Touch Bar to expand its Control Strip. To turn on backlighting, tap the Increase brightness button. To turn it off, tap and hold the Decrease brightness button, which looks like a half-circle outlined in dots, not rays.
These instructions should work for MacBooks with Touch Bars that run MacOS Sonoma, Ventura, Monterey, and Big Sur.
Adjust it in Control Center or Windows Mobility Center
Depending on the manufacturer and model of your device, you might be able to turn on and adjust the keyboard light via your PC’s control panel menu.
For certain MacBooks, that means opening Control Center, selecting Keyboard brightness, and then dragging its corresponding slider. This should work for some MacBook models that also run MacOS Monterey or Big Sur.
For some Windows 10 PCs, this means you’ll need to access the Windows Mobility Center, which resides in the Control Panel. To access it, select Control Panel > Hardware and sound > Windows Mobility Center. In the Windows Mobility Center, look for the Keyboard brightness (or Keyboard backlighting) setting, select its corresponding slider, and pull that slider over to the right.
Use the keyboard’s recommended software, if available
Some keyboards have their own specific software or app that can be used to control and customize the settings of your laptop or desktop keyboard. A great example of this is the app used for Razer’s laptops and peripherals: Synapse. The Synapse app can be used to customize the lighting effects of your Razer gaming laptop’s keyboard or your Razer desktop gaming keyboard. And this can include increasing or decreasing the brightness of your keyboard light or adjusting the settings so that the light stays on or off in sleep mode.
Most of the best gaming keyboards have some kind of back-end software that can let you adjust the RGB lighting of individual keys or turn any or all of them on or off at will.
Enable keyboard backlighting in the BIOS
In some cases, if your laptop has the right keyboard light buttons and they still don’t work the way they’re supposed to, it’s possible that you may need to check your device’s BIOS settings and make sure that they’re configured correctly, or your BIOS may need to be updated to the latest version. When doing either of these things, be sure to follow your device manufacturer’s instructions on how to do it carefully. Look up those specific instructions first. Some manufacturers like HP or Dell have posted detailed instructions online on how to check for these issues and/or correct them.
Frequently asked questions
Why won’t my keyboard backlighting turn on?
There are a number of reasons why your keyboard backlighting won’t turn on. Here are a few you may want to consider:
- Your device may not actually offer a backlit keyboard. Not all laptops or desktop keyboards have keyboard lights. Check with your device’s manufacturer to confirm that the model of your device is supposed to have backlighting. If it is, confirm that you’re using the right keyboard shortcuts, buttons, or settings to turn it on.
- Some laptops like MacBooks use light sensors for backlighting in low-light situations. It’s important to know where they are on your device and to make sure you’re not blocking them.
- Is the backlight not working or is the brightness level set too low? If the brightness level of the backlight is set too low, then the light is probably working but you’re just having trouble seeing it. See if you can increase the brightness level using our suggestions above so you can see the light better.
- You may need to update the BIOS to the latest version, or its settings aren’t configured correctly. If you decide to update the BIOS to the latest version or reconfigure its settings, be sure to follow your device manufacturer’s specific instructions for doing so.
Does keyboard backlighting drain the battery?
Yes, keyboard backlighting can contribute to the drain, as it does need power to function. If you’re concerned about conserving battery power, you can turn off the backlighting or adjust your keyboard lighting settings so that the light automatically turns off when the computer goes to sleep or the display is off.
How do I change the keyboard backlighting color?
First, make sure that your keyboard has the ability to change backlighting colors. If so, you’ll need to consult your device manufacturer’s specific instructions on how to change the backlighting color. Usually, these instructions will involve you opening a manufacturer-recommended desktop app like the HP OMEN Command Center or Razer’s Synapse app and then customizing your lighting settings within that app to add colors to your backlight.
Editors’ Recommendations