Guidare elettrico non è più solo un “must”.
Oggi è una realtà testimoniata da parecchi veicoli (auto, moto, quad, veicoli speciali) che girano per le strade europee. Il problema non è più nè la scelta di gamma, nè il prezzo (anche se ancora molta produzione in commercio costa davvero tanto), e forse neppure la diffidenza del potenziale target di automobilisti verso un prodotto (l’auto elettrica) non ancora così conosciuto e diffuso. I problemi restano assolutamente soprattutto due: la reperibilità di reti di ricarica “in emergenza” (cioè al di fuori della rete domestica o aziendale e dai punti di ricarica pubblici) e la questione “Servizi e manutenzione” nel lungo periodo. Per quanto riguarda questa ultima questione direi che il vero “mal di pancia” del potenziale Cliente è quello legato all’investimento necessario per la manutenzione in vita dell’auto elettrica, soprattutto della gestione dell’aumento potenziale dei costi o della reperibilità Ricambi. Nel primo caso invece la questione irrisolta è quale potrebbe essere il protocollo generale che un utilizzatore dovrebbe adottare in caso di batteria scarica – e dunque assenza di carica – o per distrazione o per improvviso sovraccarico di utilizzo o per cambio di pianificazione di viaggio. Per dirla brevemente:
1) Quali soluzioni possibili al di fuori del Carro di soccorso, o dell’utilizzo di vetture alternative per coprire la parte di tragitto che mancava al momento in cui si usava l’auto elettrica? Partiamo da una questione fondamentale. La ricarica di un’auto elettrica ha una serie di parametri, controindicazioni e protocolli che non si possono riassumere in un Post. Di sicuro, voglio qui invece parlare di una “soglia psicologica” di ricarica in emergenza di un’auto elettrica. Procediamo per logica: qualunque tipo di auto io stia guidando, se avessi un inconveniente riparabile (cioè che mi permettesse di ripartire dopo un tempo limitato di fermo) è prevedibile che il tempo necessario per risolvere e ripartire non sarebbe inferiore ad un’ora.
Diciamo così per semplificare, ok?
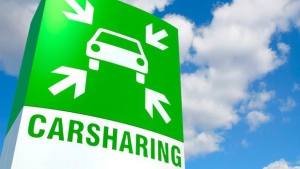
Bene: dovunque vi doveste trovare con il vostro mezzo elettrico, avendo a disposizione un bel cavo da almeno 30 metri, quante fonti di ricarica (comunemente dette “prese elettriche”) potreste reperire in un’ora intorno a Voi? Una infinità, ammettiamolo. Il problema è che non sono di Vostra proprietà, che non conoscete il proprietario e che in effetti non sapreste come remunerare il consumo causato a chi vi desse energia per un’ora almeno. La soluzione potrebbe essere tutta nell’operatività di un Gestore elettrico tra quelli oggi sul mercato. Come? Beh, ad esempio promuovendo una Community di utenti sul territorio disposti a fornire un punto di ricarica in emergenza, e consentendo tramite una facile App la localizzazione dei punti disponibili e un sistema di tracciatura, authority e contabilizzazione del flusso di energia impiegato con la ricarica, di modo che chi eroga veda uno storno automatico del maggior costo verso la bolletta/utenza di chi ha avuto la ricarica. Su tutto potrebbe essere studiato un sistema premiale sia verso chi si dimostrasse disponibile a fornire la ricarica sia verso l’utilizzatore di mezzi elettrici (sia esso proprietario o Car Sharing o Noleggio).
E’ un esempio come tanti, facile da mettere in pratica e sicuramente commercialmente valido in chiave di Marketing in vista della prossima guerra delle tariffe tra Compagnie sul mercato libero.
E ora un passaggio sull’altro enigma che secondo me ancora vincola la diffusione di mezzi elettrici : il “rischio Manutenzione” nel lungo termine e la gestione di aumento di costi o di svalutazione del mezzo. Il problema vero è tutto nella gestione del pacco batterie, in primis, e nella Garanzia del veicolo. Bene, che problema sarebbe per una Compagnia elettrica – ad esempio – operare da “General Contractor” per organizzare la formula più conveniente per i suoi utenti circa acquisto o sostituzione dei pacchi esausti, o addirittura la inclusione in bolletta di garanzie estese e accessorie?
Noi speriamo che presto strumenti del genere siano visti come leve positive di Marketing in un mercato, quello dell’Energia elettrica, che sta morendo sotto la guerra delle tariffe..…
Posted By Riccardo Bellumori.
Automotive
Pendidikan
Pendidikan
Download Anime
Berita Teknologi
Seputar Teknologi